Simple Artisan Bread
- Brittany Fan
- Feb 28, 2021
- 5 min read
Four ingredients, no kneading, and a whole lot of gluten goodness.

This recipe has been a pandemic staple in my house. It was one of the first things that I felt comfortable dropping off at friends' doorsteps or sharing with folks in my back yard, early on we didn't know how much of a risk factor food was for spreading COVID. Why? Because it bakes at a blazing 475 degrees, which felt like a surefire (pardon the pun) way to kill off unwanted contagions. But that's just my very unscientific opinion, so maybe don't quote me on that...
Made from 4 simple ingredients, this loaf is a beautiful witness to the marvel of yeast and gluten working together over time. It's got a delightful crunchy crust and a super soft, light inner texture when warm. You can technically bake it same-day, but I'd recommend the overnight (or longer) rest for deeper flavor. I find it works well to mix the dough at night, plop it in the fridge, and bake it the next evening for fresh bread at dinnertime.
The directions may seem lengthy, but the steps are simple and pretty intuitive after you've done it once or twice. It's a flexible and forgiving process, so don't be intimidated! There are also helpful notes and photos below.
Simple Artisan Bread
Ingredients:
3 1/4 cups flour, loosely measured and leveled (see notes on types of flour below)
2 tsp instant yeast
2 tsp kosher salt
1 1/2 cups warm water
Cornmeal, for dusting (optional)
Key Supplies: Your hands, measuring cups, a mixing bowl, parchment paper, and a dutch oven (or two flat baking trays if you don't have one). A dough scraper and mixing spatula if you prefer tools to hands--I don't use either because I like minimal cleanup.
Directions:
In a large mixing bowl, combine flour, yeast, and salt. Add water, and using your hand or a mixing spatula/spoon, mix everything to form a sticky, very soft dough. It should not be firm enough to knead; if it is, add 1-2 more tablespoons of water.
Cover bowl and let dough rise for about 2 hours. It should at least double in size, spread to the sides of the bowl, and be pretty bubbly.
After the 2 hours, place the covered bowl in the fridge to let the flavor deepen. I usually leave it in for 12-18 hours, but you can do up to 3 days. You can also skip this step and bake directly, but I recommend the wait.
Remove dough from fridge, and using your hands or a dough scraper, go around the edges of the bowl and separate the dough away from the bowl (as if you're getting a cake's edges loose to invert).
Lay a square of parchment paper out on your counter. Sprinkle on some cornmeal for the bottom of your bread, if you'd like.
Now we'll take the dough out of the bowl and shape it into a round form to place on the parchment. I like to do this by scooping the loosened mass of dough out with floured hands, and while still holding it, folding the messy sides of the dough down and tucking them under to the bottom, so that the top is stretched smooth and the messy edges are all gathered underneath when I set it down on the parchment. Alternatively, you can invert the dough onto a lightly floured surface, and use a dough scraper, spatula, or the side of your hand to pull the edges of the dough up and toward the center from all sides to make a round shape, and then invert again onto the parchment so that the smooth side is up. No kneading!
Let rest for 1 hour at room temperature. Meanwhile, preheat your oven to 475 degrees Fahrenheit and place an empty dutch oven in the middle of the oven with the lid on.
After 1 hour, take a sharp knife and score (cut) the top of your bread; I usually do an X across it.
With potholders, take the heated dutch oven out of the oven, and lift the parchment paper with the dough atop it and place into the pot. Quickly recover with lid and place back in the oven.
Bake for 20 minutes, and then remove lid for 5-7 more minutes of baking. The loaf should have a golden brown crust, and when tapped, will feel hard and hollow.
Let bread cool for at least 10-15 minutes before cutting. And have your butter dish and an eager stomach at the ready.
Recipe most closely adapted from Sally's Baking Addiction but also similar to many others.
Notes:
Flavor variations! You can try flavoring the bread by mixing in things in Step 1 before adding water! I love using rosemary + minced garlic. Cranberry + walnut and olive + parmesan are also fun.
Types of flour. Recipes vary in recommending bread flour or all-purpose flour; I've tried both, as well as a combo, just for fun. I prefer King Arthur All-Purpose Flour, which is actually a higher protein flour than most all-purpose options, but not quite as high as some bread flours. The higher the protein, the chewier/more elastic the bread. Play around with it and see what you like!
No dutch oven? You can use the sheet pan/baking stone method. Instead of the dutch oven, place a sheet pan or baking stone in the oven to heat up, as well as another baking tray on the rack below the one your bread goes on. Boil 3 cups of water, and when you go to transfer your dough into the oven, quickly pour the 3 cups of water into the lower tray and then shut the oven door. This will trap in extra moisture to do what the dutch oven does, which is retain moisture around the dough as it bakes.
Parchment paper. If you don't have any on hand, you can just grease the bottom of the dutch oven or pan. If you do use parchment, make sure it's safe for use at high temperatures. I also like to trim the corners so that it's circular before putting in the dutch oven, just to not have excess paper poking every which way.
Storage. You should be able to store the bread at room temperature in a tightly sealed bag for several days. Don't put it in the fridge, because that dries bread out. If I know that I won't be finishing the bread within a day or two, I go ahead and freeze some while it's super fresh, because that's the best way to keep it at peak texture/taste. You can slice it before freezing to make it easier to pull out as single servings. Just defrost and toast or freshen up in the oven when you're ready to use.
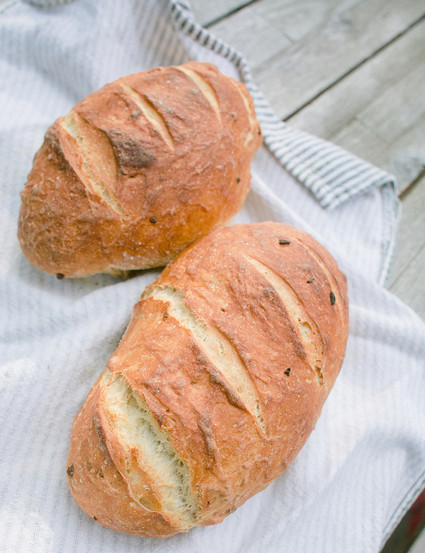
Loaf shape/quantity. This recipe can also be baked as two smaller oblong loaves, or one oblong loaf; it just doesn't work within a dutch oven, so see note #3 for the boiled water pan method.
Bubbles in bread. Note that this isn't a super airy bread with a lot of large holes, like a ciabatta or baguette. If you make sure the dough is a wet, sticky consistency in the initial dough mix, you should get some air pockets, but I've also baked some where there weren't many big holes at all, and the texture/flavor was still great. If your bread feels a little dense, play around with adding a little more water and with increased rise time before baking.
Salt. If using iodized table salt rather than kosher salt, try reducing to 1 1/2 teaspoons.
Now for some photos! Here's a visualization of the process:


And some fun artsy shots of loaves I've made!


Comments